Head gaskets, a diary of one man's fight against the studs! |
After suffering gas in the water system and increasing water loss during the summer, I eventually decided to bite the bullet and do the cylinder head gaskets. |
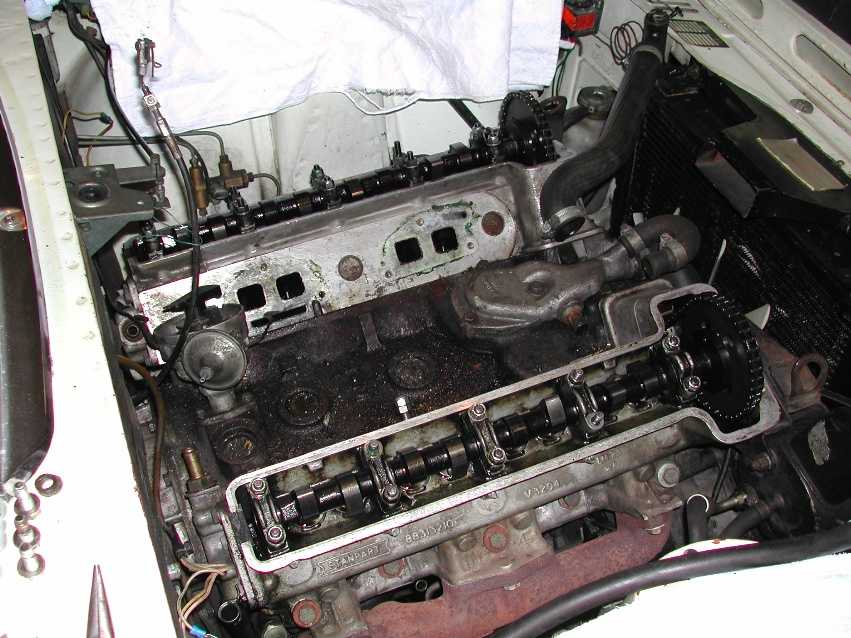
When I got the inlet manifold off, that was the real point of no return! |
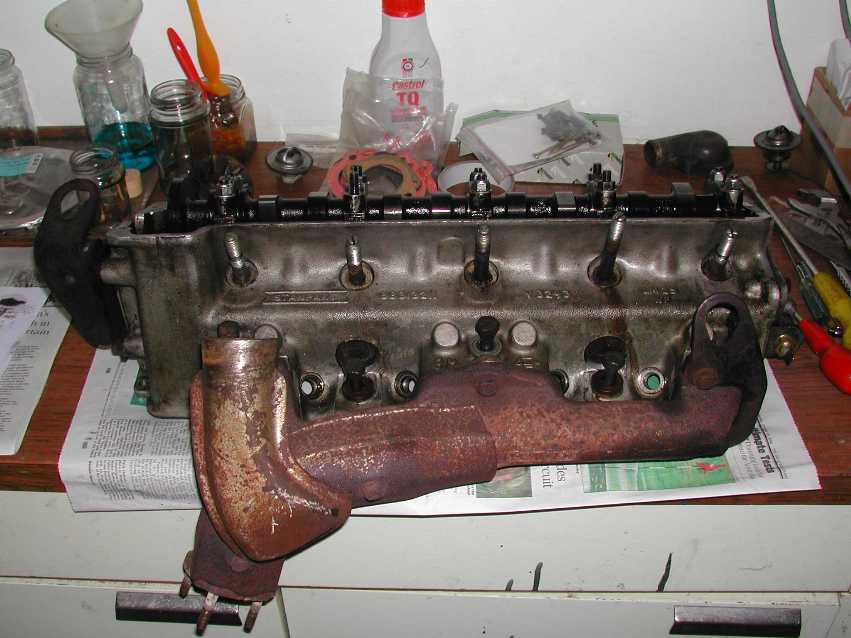
3rd Nov: Inlet manifold off
Click for bigger picture in separate window
After gaining access to the water pump, I am wondering if this is leaking as well.

Note one inlet manifold bolt already replaced with heli-coiled stud!
4 out of 10 studs free!9th Nov: After removing the inlet manifold, I was ready for the heads proper. I found I had to remove the bottom hose and radiator to get access to the two small bolts on each head at the front of the engine. I think I will need a 1/2" spanner ground down to fit the small gap to tighten them on reassembly |
||
The cylinder head bolts all released without problems - then came the dreaded studs! |
||
At first, none would budge at all, so after going into a cold sweat, I applied WD40 and went to watch TV. The next day, two came free, and the day after, another. |
||
After a week of soaking, and trying Freeway, as well, a 4th stud released today. |
||
So far I have removed the centre stud and the one at the front of the engine on each cylinder head. |
||
12th Nov: After working the remaining studs hard for a couple of days, on the third day, my first attempt on one stud resulted in disaster with very little torque applied.
So take it easy with the big spanners and let the WD40 have time to work its way down. I have purchased a tommy bar for the socket wrench with a 60cm handle which makes it easy to work the studs, but it is also very tempting to be too heavy handed. |
||
However, it wasn't long before a 5th stud worked loose. |
||
It seems that I must have work-hardened the stud somehow and it twisted off at the base of the threaded section, flush with the cylinder head surface. |
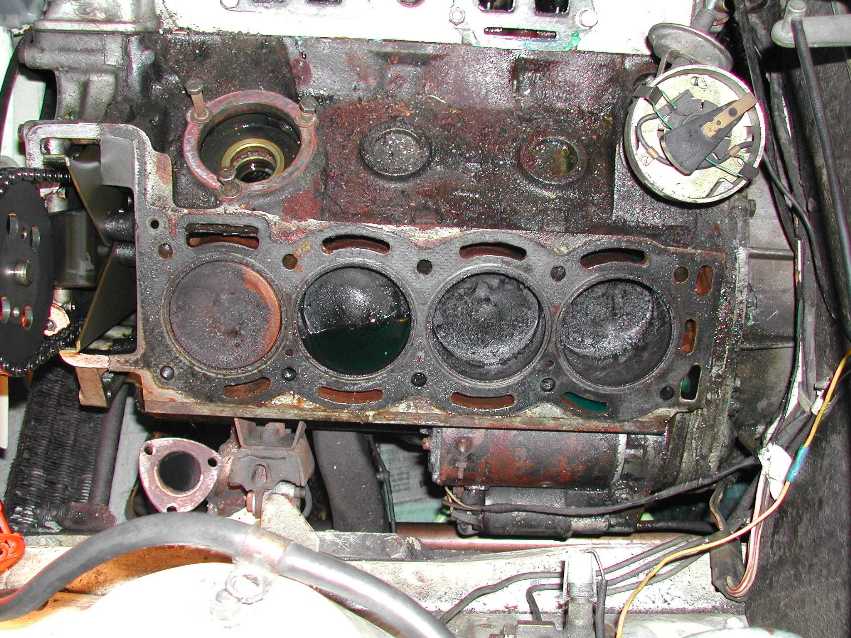
8 studs free and both heads off! |
23rd Nov: After the 8th stud came free, it was relatively straightforward to lift off the LH cylinder head. |
But prior to that, I had to release the fuel pipe from the nut that secures the shock-absorber so that the head could just be manouvered over the timing chain sprocket wheel, complete with exhaust manifold attached. |
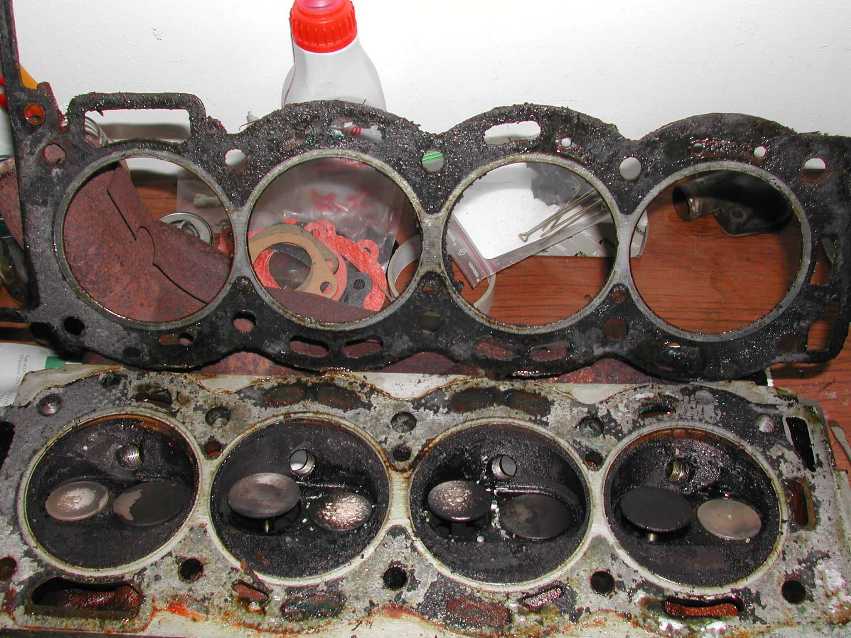
LH cylinder head with exhaust manifold attached
The head gasket didn't seem too bad. |
No obvious signs of leaks from the cylinders. |
LH cylinder head and gasket
Closer inspection of the waterway beneath No4 cylinder revealed a |
stray piece of wire which turned out to be about 5" long! |
Wire retrieved from waterway
The RH cylinder head proved to be a bit more tricky due to the two sheared off studs still in place. |
I was able to tap the head up a bit with a block of wood and 2-lb hammer until the housing fouled the timing chain & sprocket. |
At that point I was able to cut the nearest stud with a hacksaw, leaving about 1/4" proud of the block. |
Then I was able to rotate the head and lift it further off the block so I could cut the remaining stud leaving about 1/2" proud. |
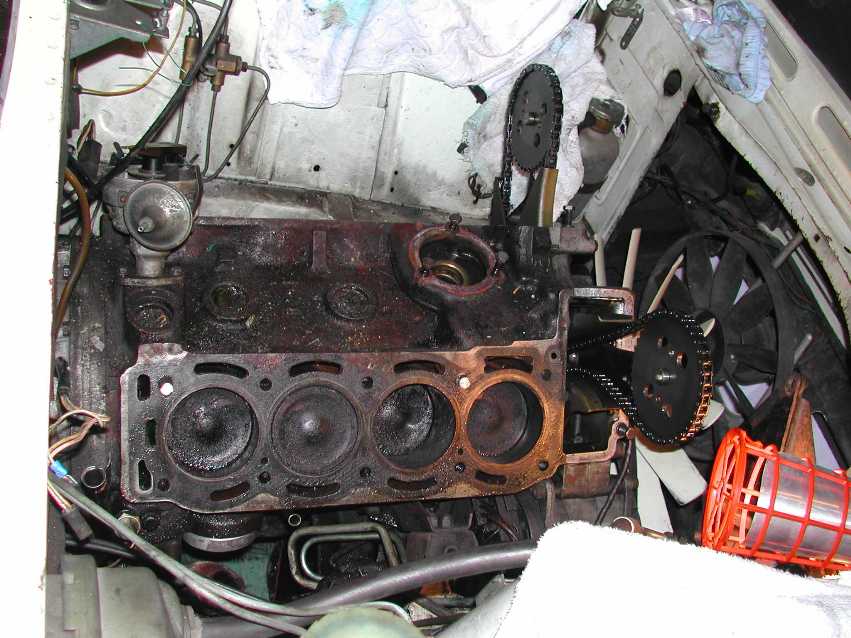
Then the head could be lifted off! Note the remaining studs. |
RH cylinder head removed |
RH cylinder head and gasket |
 |
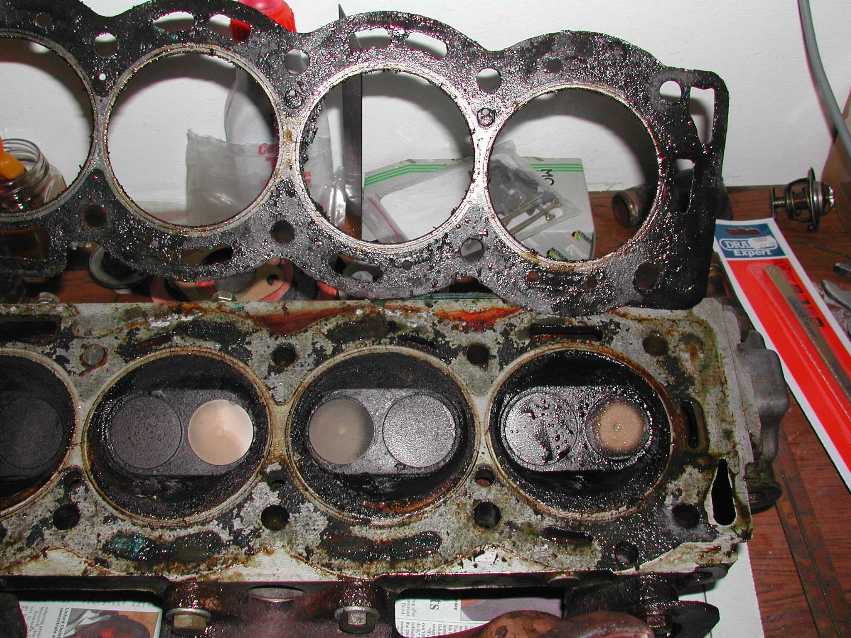 |
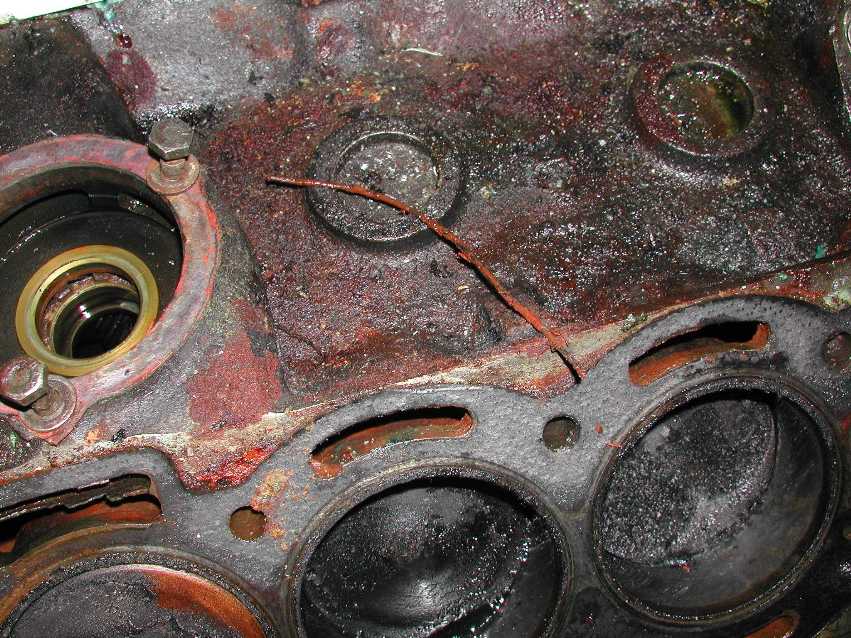
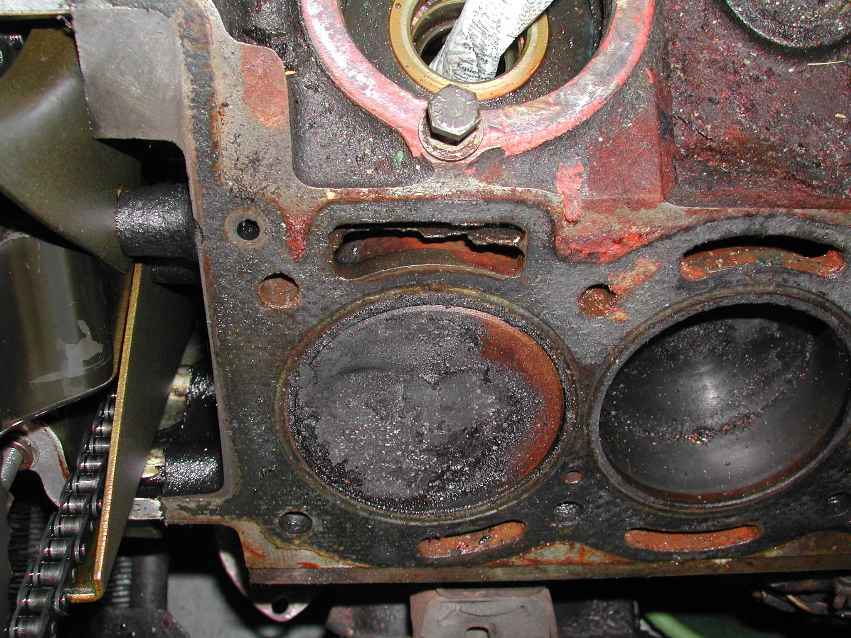
The head gasket seemed OK but maybe a water leak from cylinder No7? |
Also, there is some staining between cylinders 4 & 6, especially on the block side of the gasket. |
It looks like the RH cylinder head was not tightened down adequately? |
Rust between cylinder 7 and waterway |
||
 |
 |
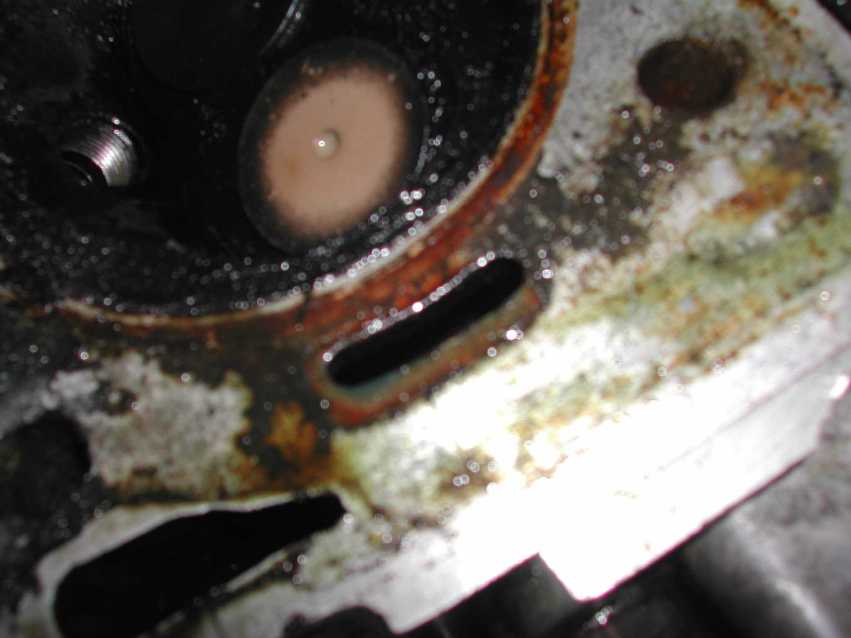 |
By comparison, cylinder 8 is very clean:
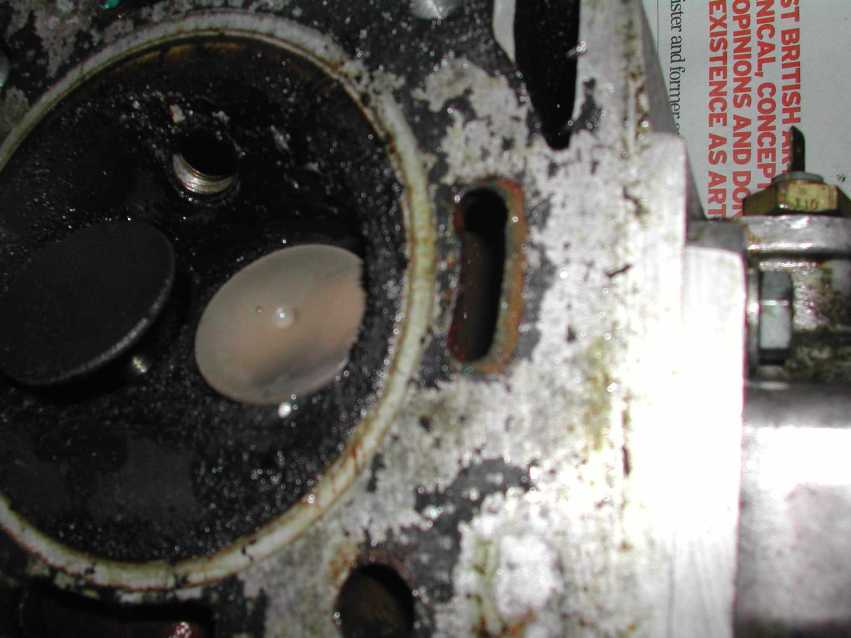
Waterways generally seemed to be in good order with the exception of some significant erosion where the outlet from the water pump joins the cylinder heads. It can be seen that the thin section of cast iron separating the pump outlet from the return to the main block is almost disappeared in the RH side of the block:
Erosion on LH side |
Erosion on RH side |
 |
|
I'm not sure if this has any real effect since the two waterways are combined inside the cylinder head anyway. |
Not much done in the run-up to Christmas, but started with renewed vigour after the turkey!
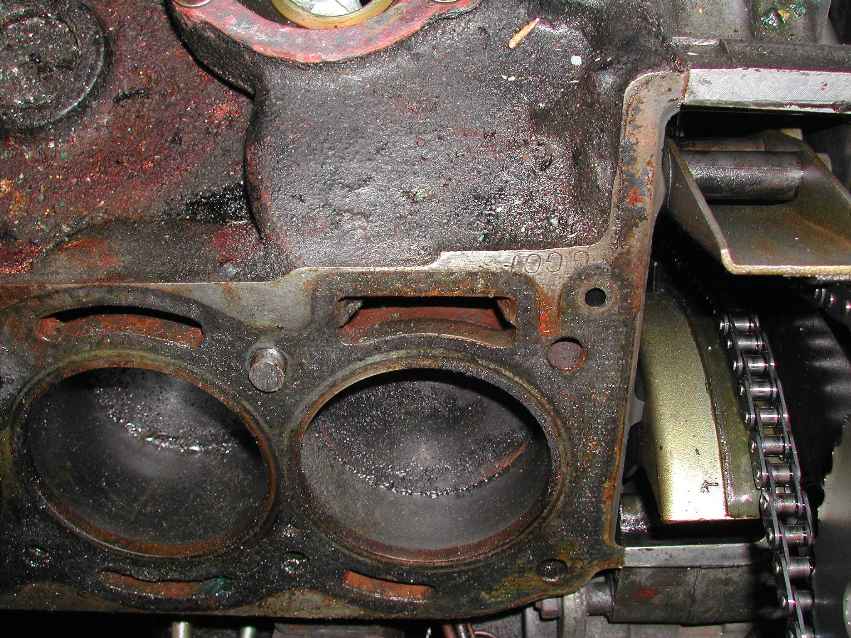
Do you agree with the alignment of water passage holes in the head gaskets?
LH head - cylinder No 8
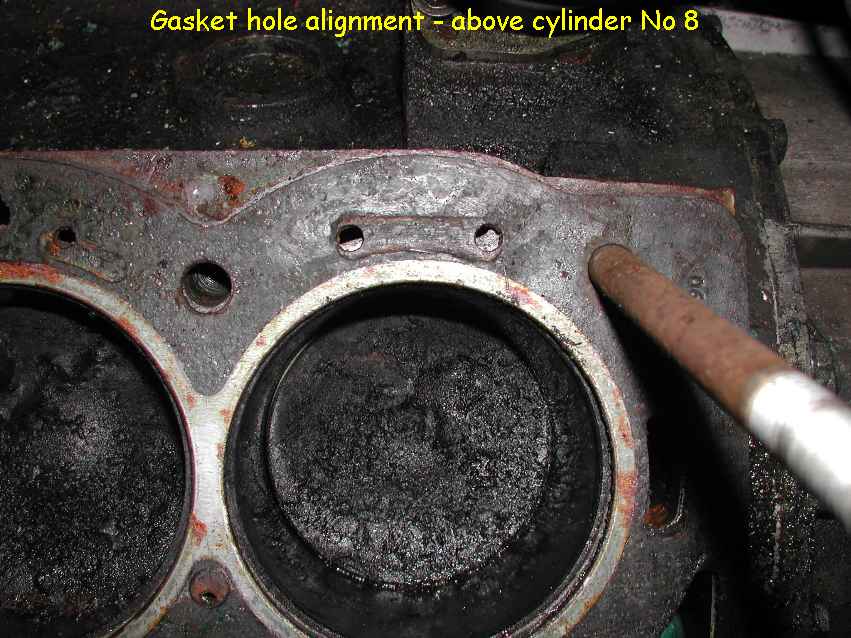
Note how only a small fraction of the holes in the gasket align with the passageway in the block
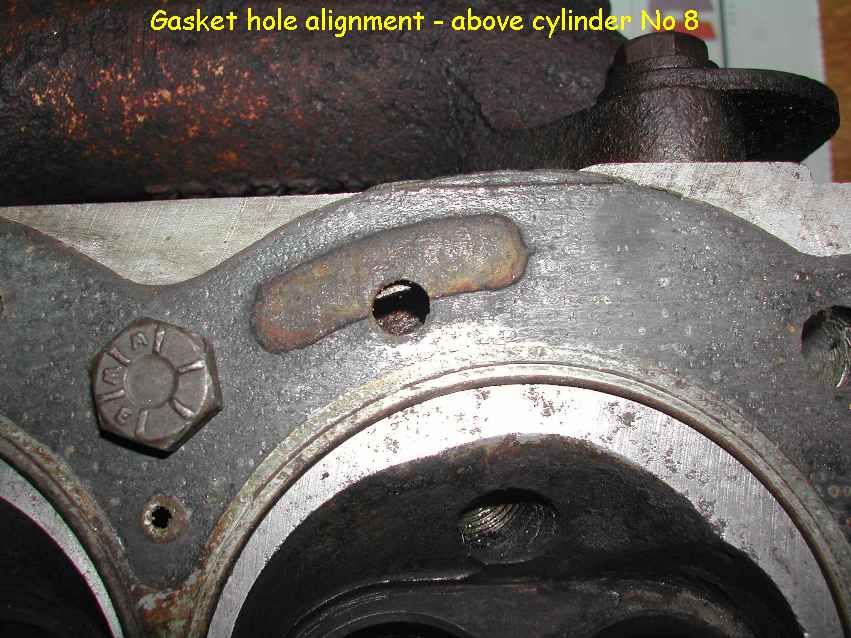
LH head - above cylinder No 8 |
LH head - beneath cylinder No 8 |
 |
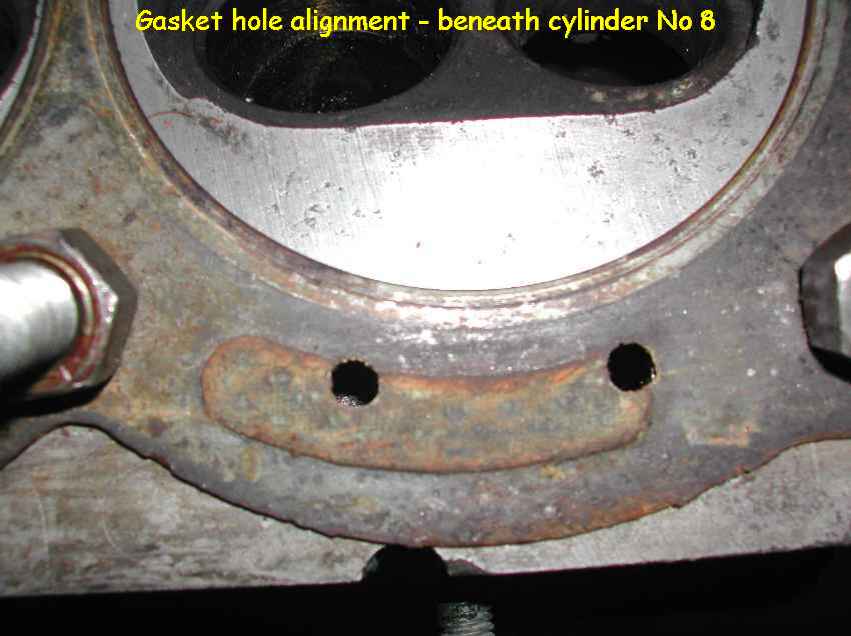 |
Note cylinder head covers approx 1/5th of hole area, and from the impression on gasket, the block covers around 1/2 thehole. So actual open area for free water flow is only about 0.3 of the hole size. |
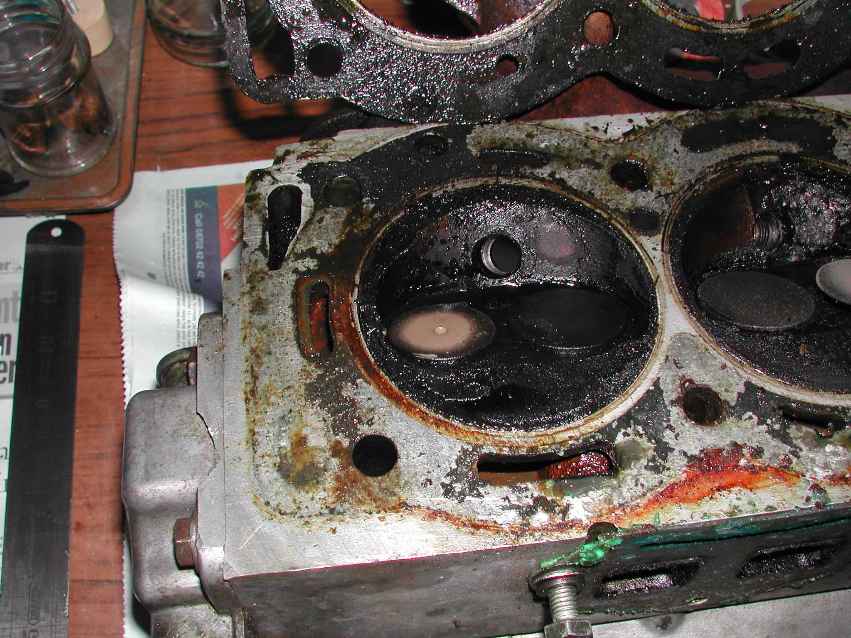
LH head - beneath cylinder No 6

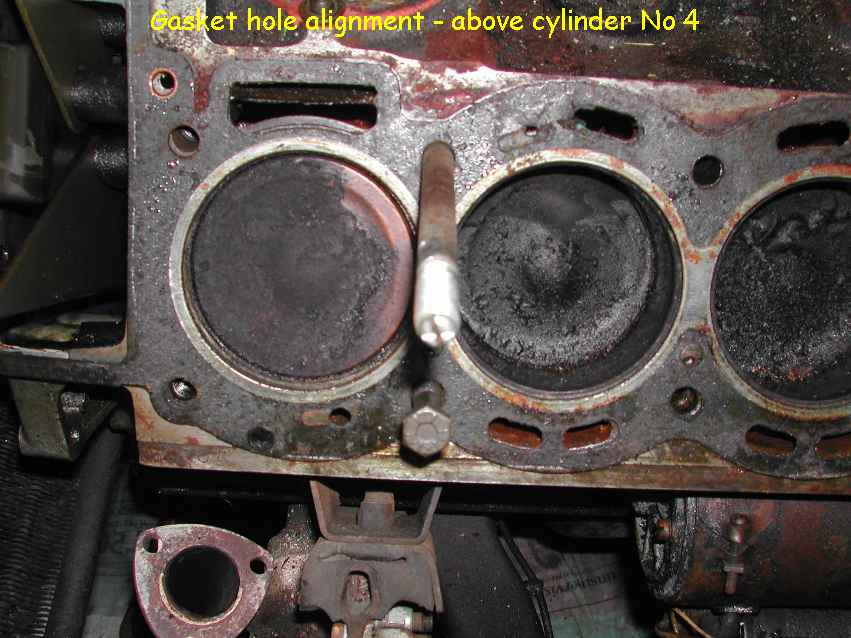
LH head - cylinder No 4 |
LH head - beneath cylinder No 4 |
 |
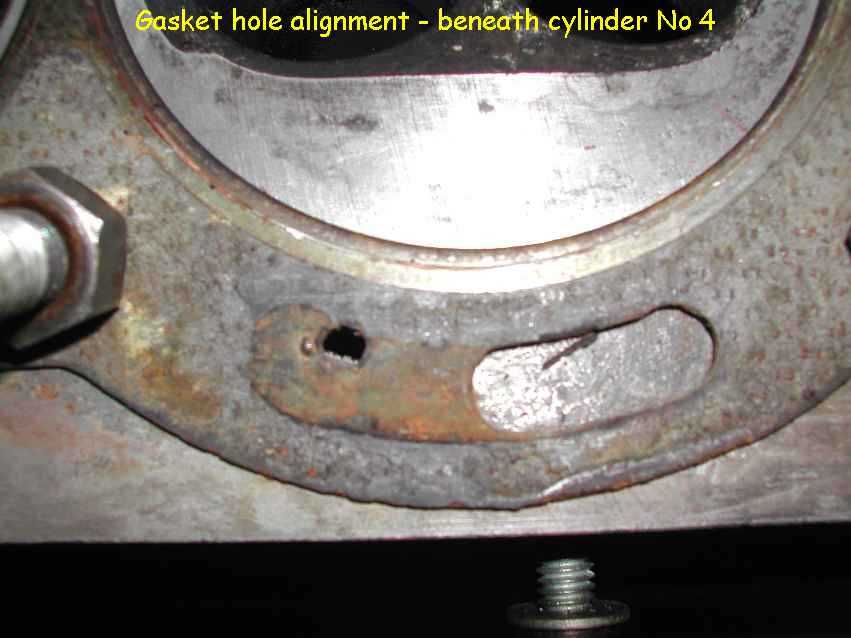 |
Note how only a small fraction of the hole in the gasket aligns with the passageway in the block
LH head - above cylinder No 2
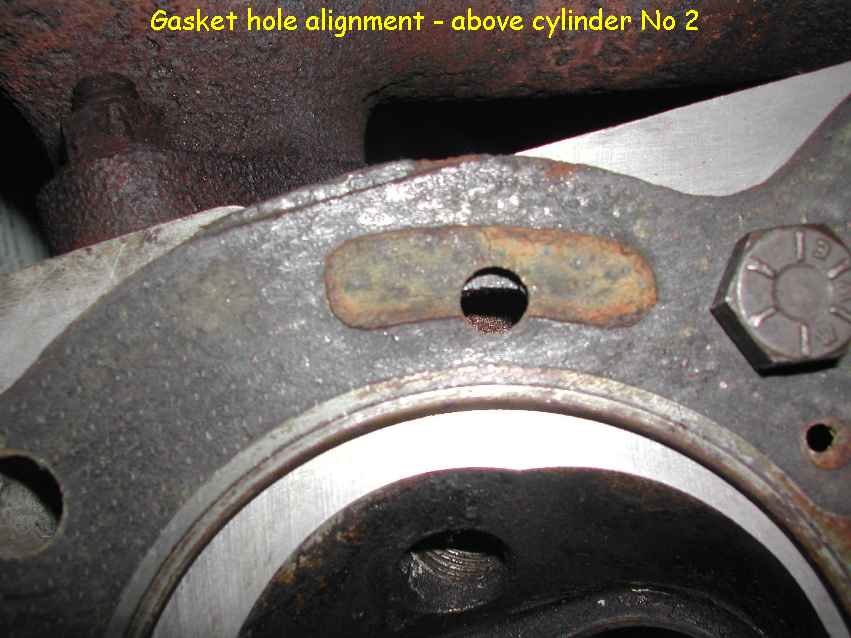
Similar comments to those for cylinder No 8 above, ie only around 0.4 of the hole open to flow.
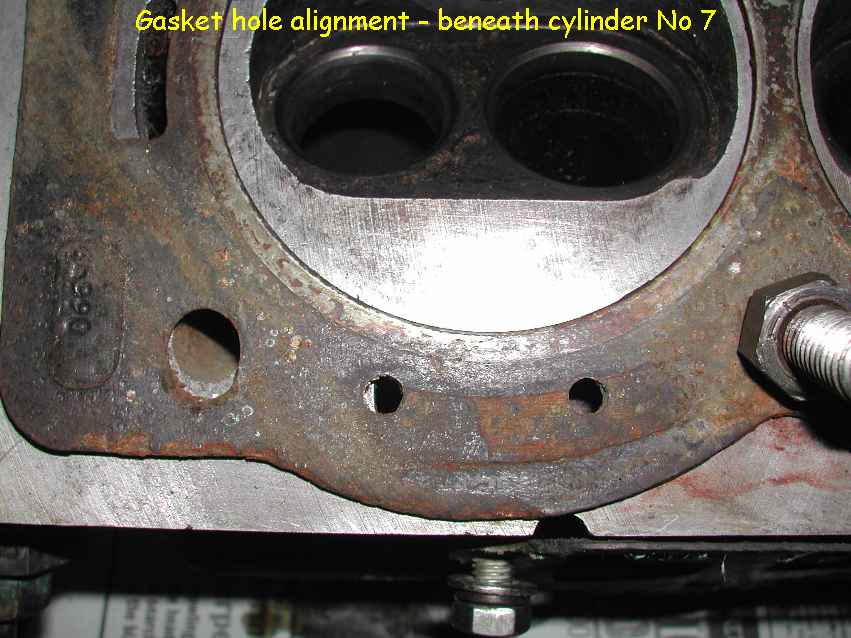
RH head - cylinder No 7

Note how only a small fraction of the holes in the gasket align with the passageway in the block
RH head - above cylinder No 7 |
RH head - beneath cylinder No 7 |
 |
 |
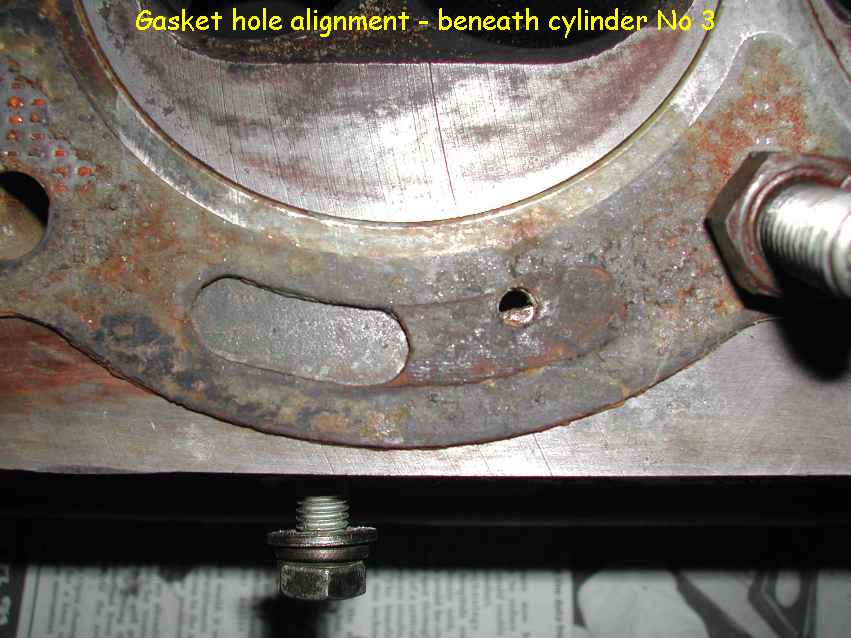
Note most of the hole is open to flow compared to cylinder No 8.
RH head - beneath cylinder No 5 |
RH head - beneath cylinder No 3 |
 |
 |
RH head - above cylinder No 1
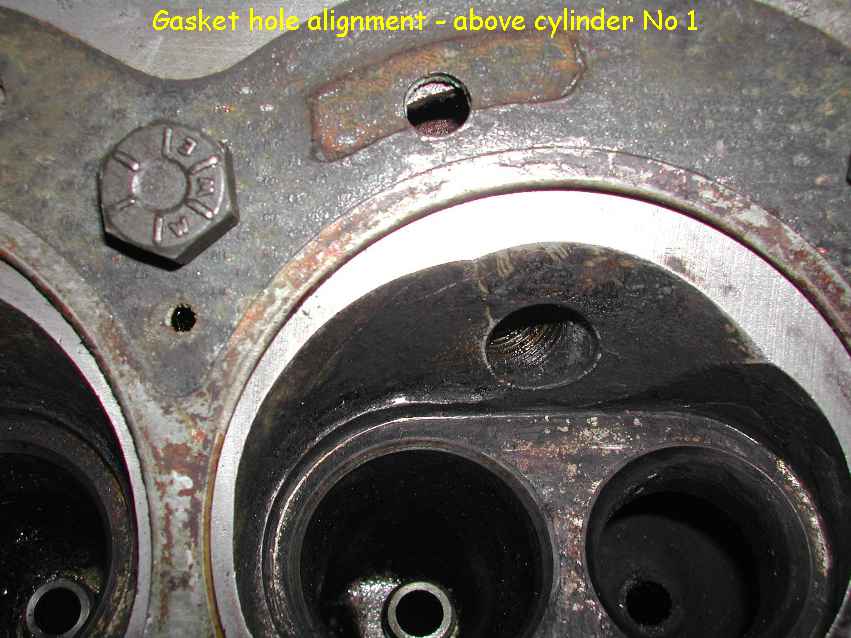
Similar to Cylinder No 2, only about 0.4 of hole open to flow.
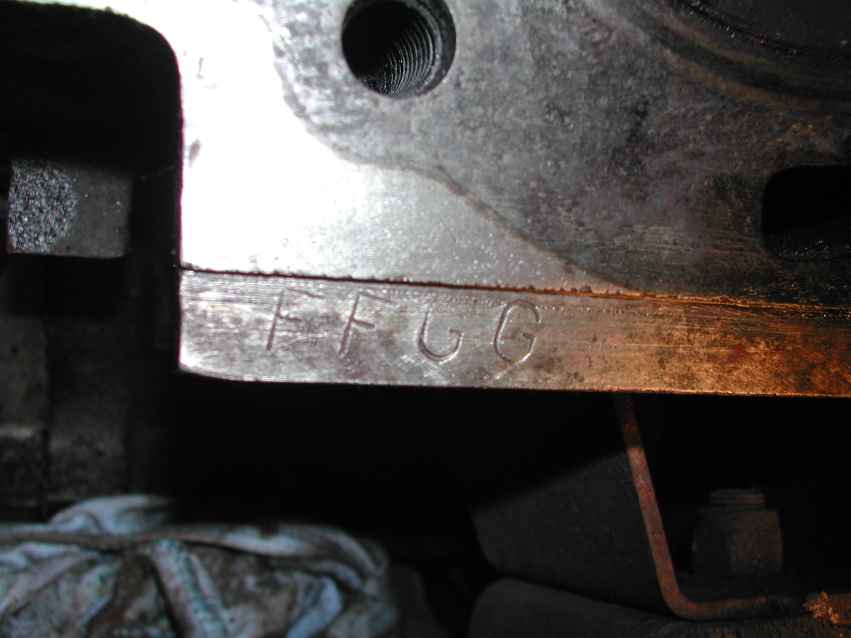
Cylinder Quality Stamps
LH Stamp FFGG |
RH Stamp GGGF |
 |
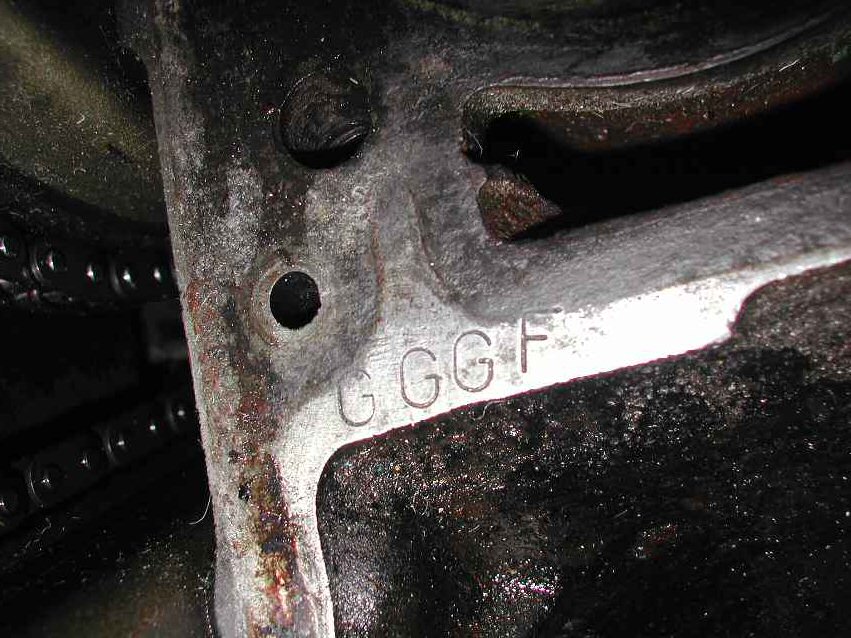 |
Grade F signifies cylinder bore within 3.3853"-3.3858"
Grade G signifies cylinder bore within 3.3859"-3.3864"
Close this window